 Blender Tutorials
Blender Tutorials
Blender Tutorials
Navigation: |
Adding Materials to the Simple Train EngineThis Tutorial is meant as an introduction to applying materials in Blender (2.5 and up). You should already have completed the Modelling a Simple Train Engine Tutorial. Table of ContentsTo begin this tutorial open Blender and load the Simple Train Engine blender file from: Building a Simple Train Engine Tutorial. SmoothingFirst off we want to make the Boiler portion smoother (so that the flat sections of the cylinder are not as noticeable). To do this, select the boiler object using 'b' and in the "Object Tools" Panel of the left "Toolbar", under Shading, select the "Smooth" Button. The Boiler, Smokestack and wheels should now apear smoother and also a bit shinier. While this method of smoothing can be effective for most circumstances, on larger flat surfaces it can result in stange artifacts. 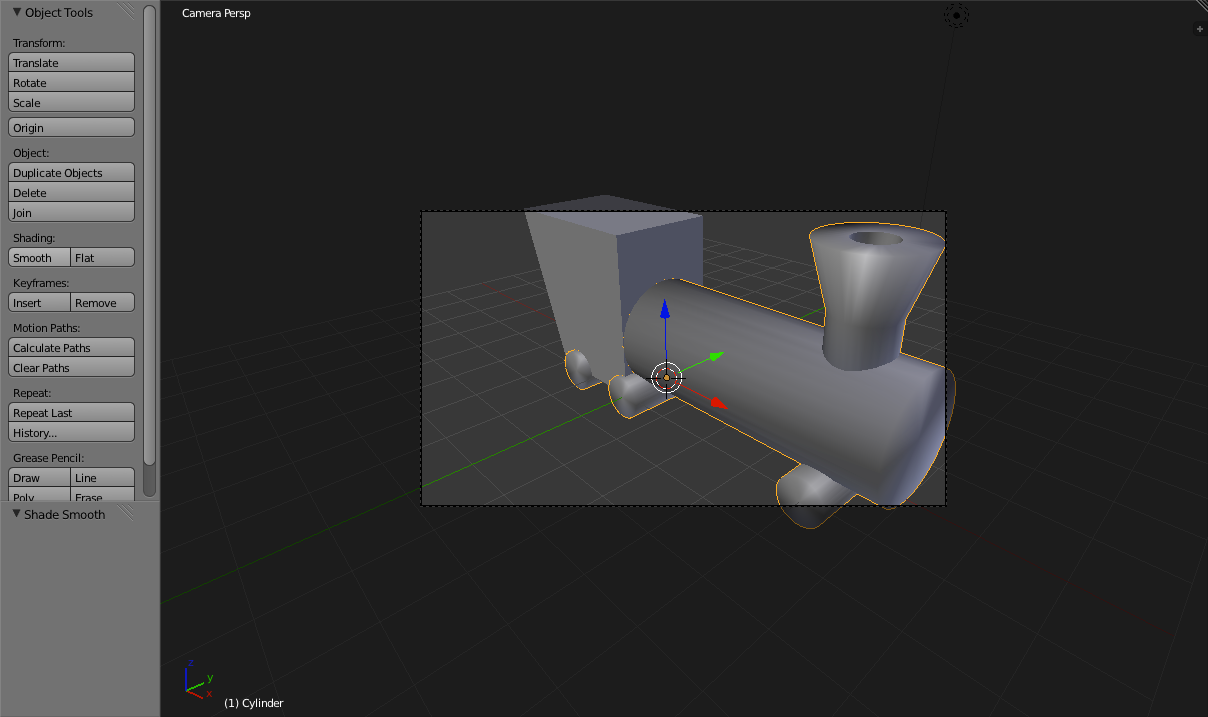
Simple Materials
Now, with the Boiler still selected, go to the "Materials Panel"
( 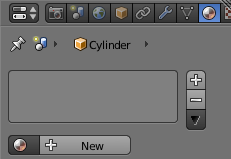
Now click the "+ New" button in the "Materials panel". This creates a new material and assigns it to the Boiler object. 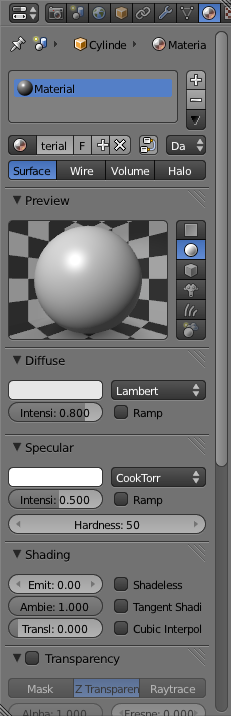
Now click on the white rectangle in the "Diffuse" section of the Materials Panel. This will bring up a color picking tool. To select a colour, click i the colour wheel and you can adjust the brightness using the slider to the right. You can also set the colour by entering it into the "R", "G" and "B" fields at the bottom. 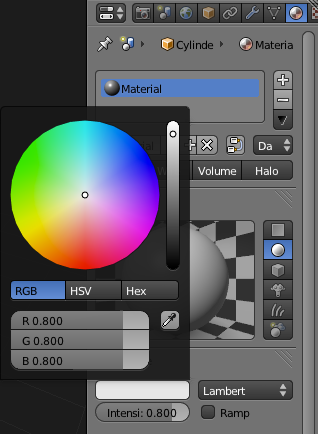
For the Boiler I'll be making it a Dark Grey though you can make it any colour. 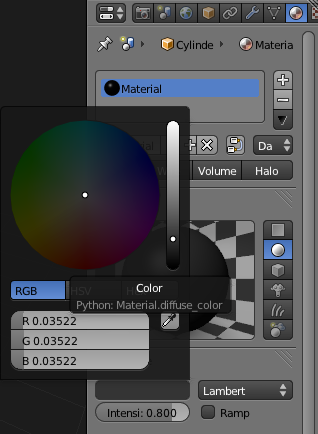
To deselect the Colour picker click elsewhere in the materials panel. The Train should now have a dark grey boiler, smokestack and wheels. 
Simple TexturesSelect the Train Cab using the 'b' key and add a new Material, using the "+ New" button in the "Materials Panel". 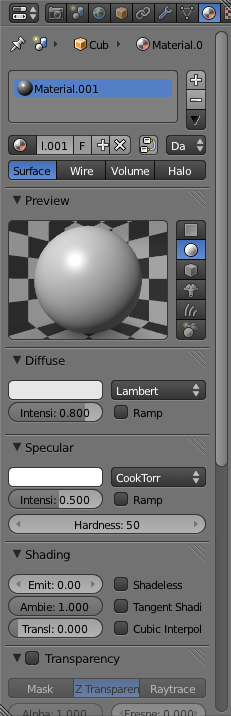
Now go to the "Textures Panel" ( 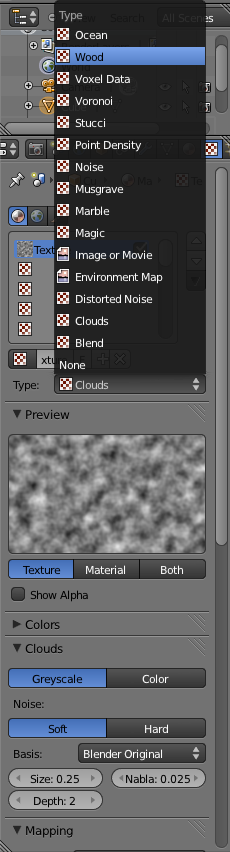
Textures default to the clouds texture though, if you click on the "Type:" Drop down box you can see the list of texture types you can select from. Since none of these texture types would work particularily well for our engine cab (without getting into more advanced texturing features) select the "Wood" texture type. 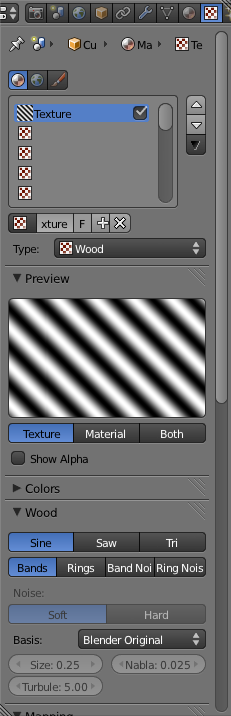
The Default settingsa for the wood Texture type give you a series of Straight lines alternating from light to dark. To get a noisier look to the texture, select "Band Noise" in the "Wood" Section. 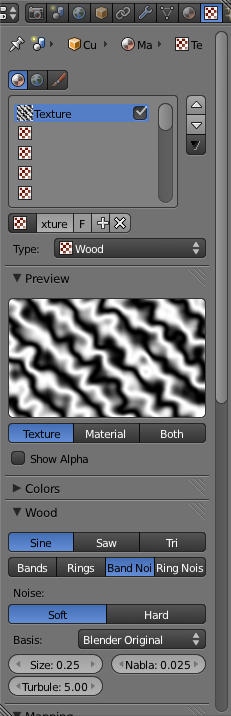
Now Scroll down in the "Textures Panel" Until you get to the bottom of the "Influence Section" where there is a bright magenta rectangle. By Default the darker portions of the texture are filled in with that colour. 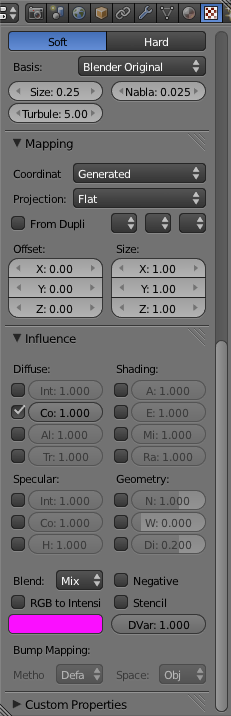
Click in the Magenta Rectangle to change the colour. This time I selected a darker Blue Colour. 
Once again exit the colour picker by clicking elsewhere in the Texture panel. Rendering
Now go to the "Render Panel" ( 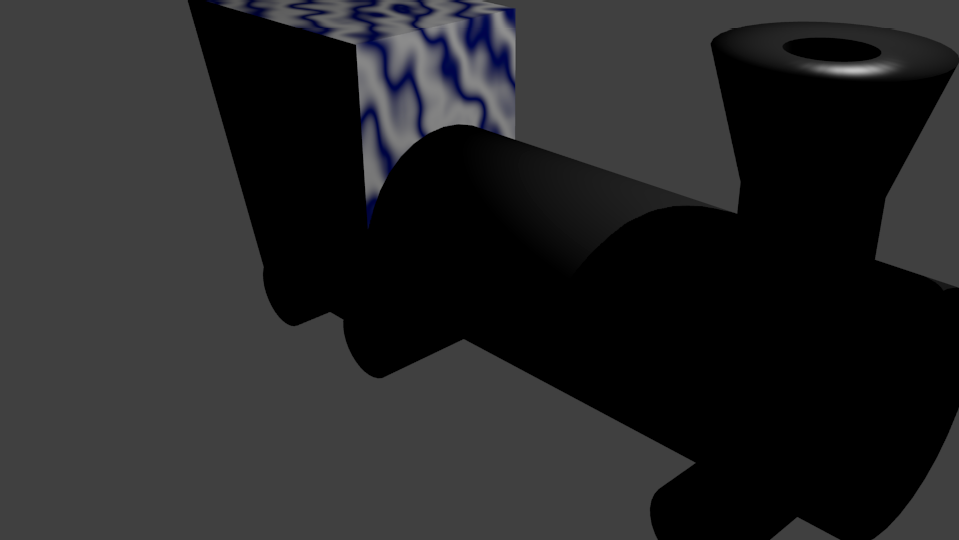
To exit this view and return to the regular 3d view, you can press 'Esc'. We now have a simple train Engine that has two materials applied to it. Feel free to play around with the material and texture settings for the Cab and Boiler and have fun! Also, don't forget to save. Continue Learning: |