 Video Editing: Transporter Effect
Video Editing: Transporter Effect
Video Editing: Transporter Effect
Navigation: |
Transporter effectFirst thing to do is to make and render the transporter effect using Blender. (Click here for a tutorial) Next you import it into Adobe Premiere Elements. You then collect your other media. You will need 2 shots (video or still) of the scene you wish to apply the effect to. For the purposes of this tutorial I will use a simple picture of a box and a picture without the box. ***Important: make sure nothing aside from the transported object(s) move between shots Media PreparationOnce all media is loaded, make sure that the lower "window" of Adobe Premiere Elements is set to timeline mode. You then drag the transporter effect animation into the "Video 2" section. Then place, side by side, the two shots in the "Video 1" section. Center the transporter effect over the break between the 2 shots and shorten it to the length you want. Go to the video transitions tab and apply a cross dissolve transition between the two shots. Also apply a cross dissolve to the ends of the transporter effect (shorten them as necessary). 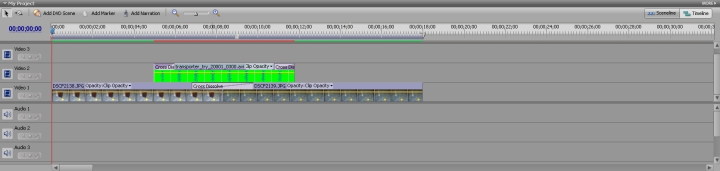
Chroma Key StepNow to get rid of the green background on the transporter effect. Under the video effects section, go to the keying portion. Select and drag the Chroma Key onto the transporter effect media in the timeline. Now make sure that the scene on the monitor is at one of the parts of the transporter effect sequence with lots of the "particles" visible. 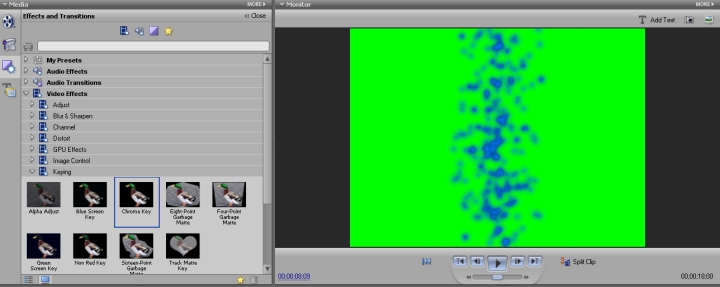
Now select the transporter effect sequence. Go to the properties window and open up the Chroma Key section. Click on the eye dropper symbol and then click the green background of the transporter effect scene. Then increase the similarity section until as much of the green (and nothing else) is black. 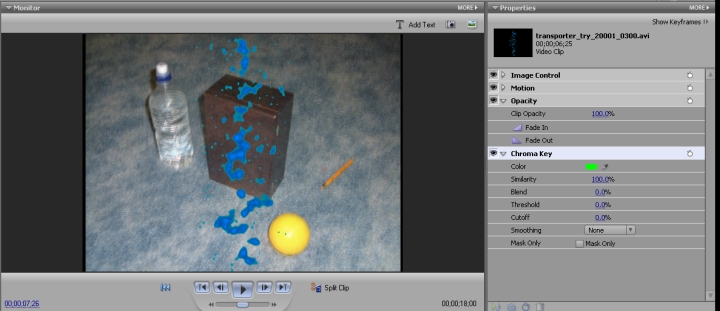
ConclusionNow add any sound effects you want and fine tune the settings until you are satisfied. |