 Blender Tutorials - Old
Blender Tutorials - Old
Blender Tutorials - Old
Navigation: |
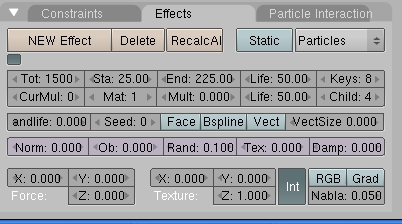
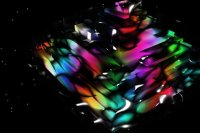
Basic Transporter effectThis Tutorial shows how to create a basic but reasonably good looking transporter effect in Blender. For uses with live action footage, see the tutorial on the Video Editing Page. The first thing to do is to arrange the camera to look down one of the axes. For this tutorial I have chosen to have the camera look down the Y-axis. Then clear all objects aside from the camera. Constructing the "core"In any view, create a plane. Then press Alt-M and merge the vertices at the center. Now extrude the point multiple times (not too many times) to make a line along the Z-axis that goes almost to the edge of the camera view. (Note: one extrude, a grab and the subdivide feature can also be used) 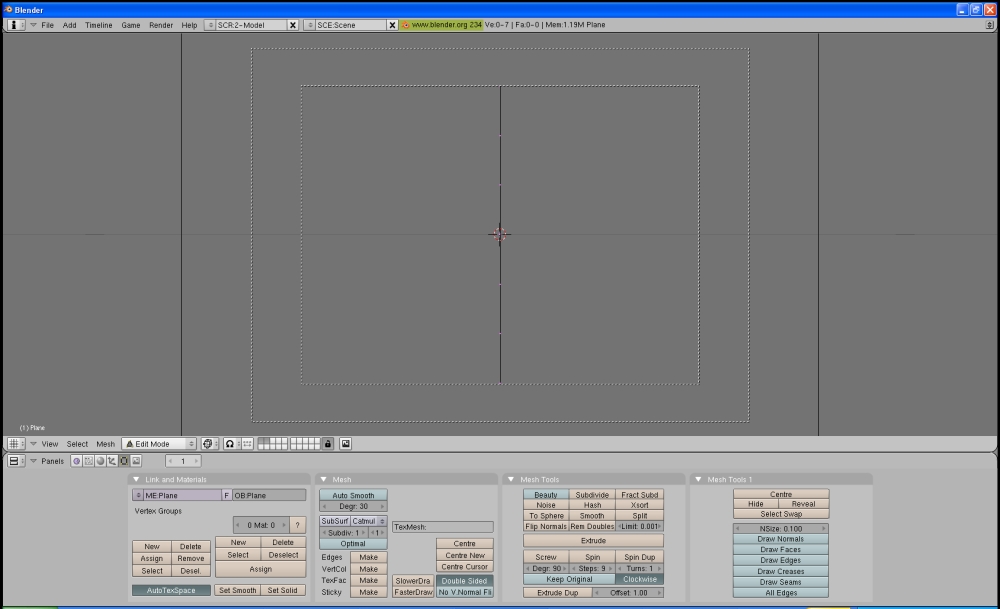 (About what the line should look like from the camera view) Particle EffectNow go to the object panel. Under Effects, create a new particle effect. Then set the particle effect settings to match those in the picture below. (if the picture is not visible then change those listed in the table to the stated values)
MaterialsNow create a new material and make it whatever colour you want. I chose to make it mostly blue with a little bit of green to soften the colour. Now set the background colour to a colour that is different than your particle colour. (i.e. don't use a blue background for blue particles.) I chose green but it doesn't matter very much. Just make sure that the colour is reasonably bright and mostly pure. Fine-Tune and AnimateGet all the settings the way you want and animate a scene that is at least 300 frames long. (for easy use in a video editor, set the Format to AVI and change the top field in the output section to an easily accesible folder) (for this movie the "core" had 11 vertices) |